Hi there,
Today it's my turn to show you a creation which I've made for the Colourstock blog using their products. This time I have finished the 2nd background made with the cover a card from Impression Obsession called Peacock feathers. If you want to see the other background and creation, just take a look here.
I have been working with Copic markers on the main image of the girl(Sweet Pea stamp) and the background is made with Pan Pastels. I have a lot of these Sweet Pea face stamps because I love to color and draw faces.
I have taken several photo's during the coloring process.......so let's get started.....
I've stamped her with Memento London Fog and first coloured the face(look for the exact colors on the Colourstock blog)
Hallo allemaal,
Vandaag is het mijn beurt om jullie te laten zien wat ik voor het Colourstock blog maakte met hun producten. Ik heb de 2e achtergrond afgemaakt die ik met de cover a card van Impression Obsession maakte, Peacock feathers. Voor degenen die het eerste blogbericht niet hebben gezien, dit is de achtergrond in stappen.
1e laag- Pan Pastels aangebracht met de big oval sponge
1st layer- Pan Pastels applied with the big oval sponge
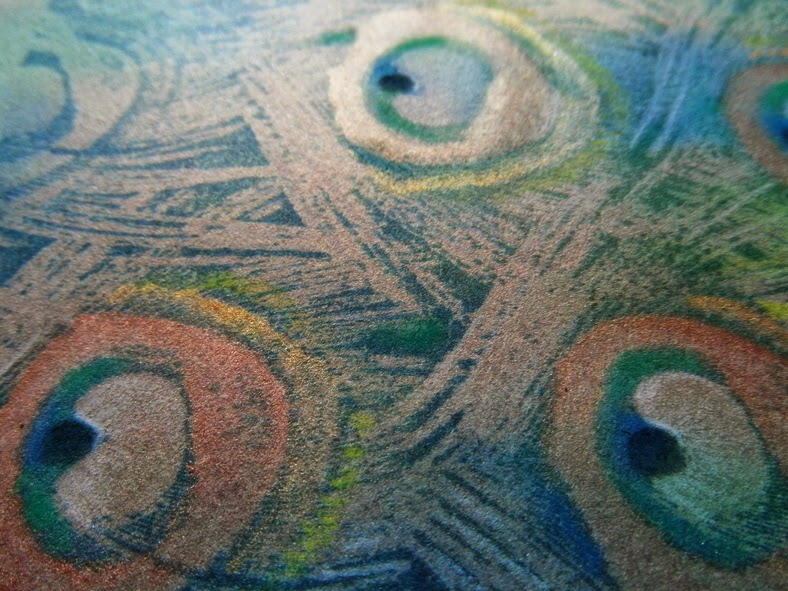
de pauwenveer achtergrond gestempeld met blauw en groen
Peacock feathers stamped with blue and green ink
gedeeltelijk ingekleurd met Pan Pastels en kleurpotlood accenten
partially coloured with Pan Pastels and accents of col.pencils
hier kun je de glans van de Metallic Pan Pastel goed zien
here you can see the shine of the Metallic Pan Pastels even better
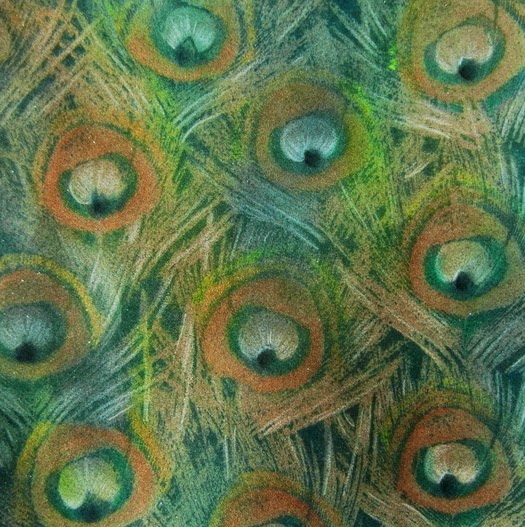
the finished background
de uiteindelijke achtergrond
eerste laag- het gezicht gekleurd met Copic markers
first layer- coloring the face using Copic markers
Bij de eerste laag had ik alleen de E kleuren en de R20 gebruikt, ik miste diepte en schaduw.....
Bij de 2e laag de C kleuren aangebracht op de schaduw plekken, zie je het verschil?
Nog een laag met de C serie.......
laatste lagen en het is klaar......

coloring the flowers
flowers and first layer of coloring the first layer of hair
2nd and 3rd layer of hair
4th layer of hair coloring
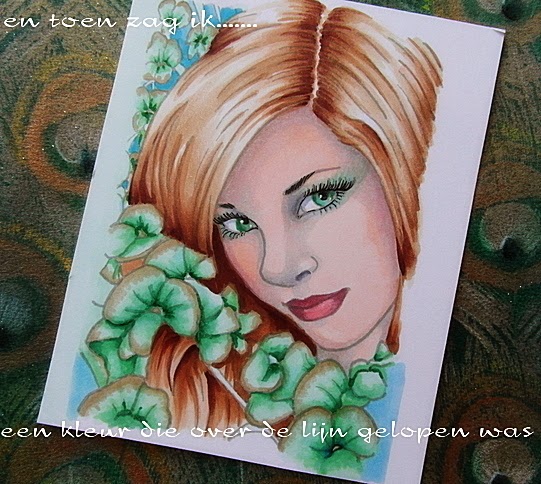
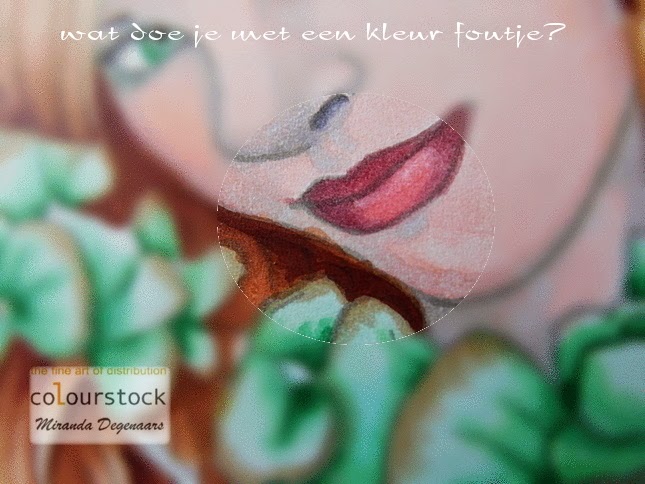
And than I noticed an outside the lines color mistake at the side of her face....
what to do when you have a ' bleeding' problem?
I've used the colorless blender to ' push' the color back.......
And that helped.......so here is my finished 'Peacock lady'.......o yes I almost forgot.....I wanted to add some matching die cut flowers to it and found the old Crealies Creative flower no.3 which I coloured using the same Copic colors. Isn't that lovely?
En dat hielp......dus hier is de uiteindelijke versie van mijn ' Peacock lady' o ja bijna vergeten...ik wilde nog wat bloemen toevoegen die bij de afbeelding pasten en vond de oude
Crealies Creative flower no.3 die er perfect bij paste. Ik heb ze gekleurd met dezelfde kleuren Copics. Is het niet mooi geworden zo?
And than I had some flowers left to play with....and I 'tangled' them, it's such fun to do! I've used a green Copic multiliner no.1 and used the same Copic markers. Next time I will create a background for them!
En toen had ik nog een aantal bloemen over........en had ik eindelijk eens wat tijd om lekker te 'tangelen', het is zo heerlijk om te doen! Ik heb de groene Copic multiliner 01 gebruikt. Volgende keer geef ik ze een achtergrond........
Well, hope to have inspired you and if you want to know the colors I've used and the background technique just take a look here and here on the Colourstock blog.
Hope to see you next time!
Zo, ik hoop jullie geïnspireerd te hebben! Als jullie de gebruikte kleuren willen weten neem dan een kijkje op het Colourstockblog, daar staan ze allemaal vermeld.
En deze geweldig mooie peacock achtergrond stempels zijn te koop bij de Posthumuswinkel in Amsterdam!
Hoop je volgende keer weer te zien en bedankt voor je reactie, vind ik altijd leuk om te lezen!