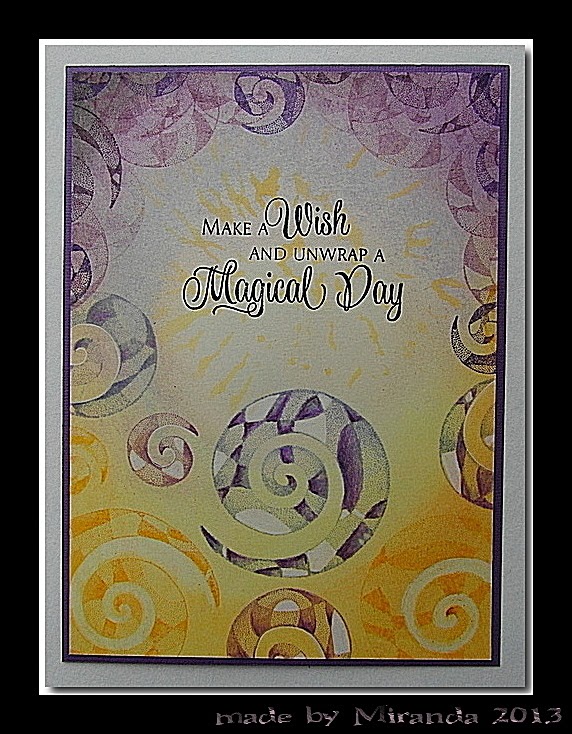
It's been a while.........really busy with workshops, preparing.........DT work, but here is a tutorial from the last Christmas Pan Pastel workshops using the new Metallics. They are great!
I've made an easl card, one in black with the two metallic gold Pan Pastels and one with broken white and blue using the metallics Silver and Pewter. This time we used also some stencils from Pick-up.
Hallo allemaal,
Het is weer een tijdje geleden.......heel druk met workshops, voorbereiden.....DT werk, maar hier dan een tutorial van de laatste Kerst Pan Pastel workshopkaarten met de nieuwe metallics. Ze zijn super!!
Ik heb een easl kaart gemaakt, een in zwart met de twee goudtinten en een in gebroken wit en blauw met de twee zilver tinten


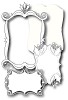
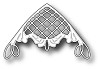
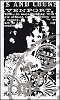
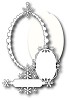
Stencils we have used.....
Stencils van Pick-up die hierbij gebruikt zijn.....


and the variation of the black card.....using more white paper and the girl has been on worked with black Pan Pastel.
en de variatie van de zwarte kaart.....meer wit papier gebruikt en het meisje is bewerkt met zwarte Pan Pastel.


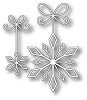
stencils which are used
Stencils van Pick-up die hierbij gebruikt zijn
Black and Gold card- zwart met goud kaart
Materials you need- Benodigdheden:
Pan Pastels
metallics light and rich gold 910.5/911.5
yellow ochre 270.8/270.5
black 800.5
Versamark/sponge
Memento inks; black/peanut brittle/rich cocoa
Distress stain Tarnished Brass
Memorybox dies;
Holly Holiday frame set
Gwyneth flourish
Precious elements
Angel corner
cling stamp Marianne design
Viva Decor stamps
Chocolate Baroque 'Warm Christmas Wishes'
Crealies creative flower no.2
Crealies creative petal no.6
Crealies Bits & pieces clear stamp no.3


black card 15x15 cm(folded as an easl)
zwarte kaart 15x15 (gevouwen als easl kaart)
white card 14.5x14.5 cm (inside)
black paper (thin)for die cutting flower and leaves
black and white paper for other die cuts
pearls
Step by step instructions
stap voor stap beschrijving:


Which materials are different from the previous card:
Welke materialen zijn anders dan bij de vorige kaart:
Pan Pastels:
Metallics Silver and Pewter 920.5/921.5
Ultramarine: 520.8/520.3/5201
Memento inks: Gray Flannel/Nautical Blue
Distress stain Brushed pewter
Memory box dies:
Katy corner
Peaceful Snowflake frame set
Precious snowflakes

Broken white cardstock
thin matching matte and shiny paper for flower and leaves die cuts
Gebroken wit cardstock
dun bijpassend mat en glanzend papier om de bloemen/blaadjes te snijden
Girl stamp Marianne design

The step by step instructions of this card are exactly the same as written above.
De stap voor stap beschrijving is precies hetzelfde als hierboven beschreven.
Here you see the same girl stamps but here is the image only stamped with inks, so the image is sharper. Than I've added on some of the snowflakes and holly branches the metallic PP's. You can see that on the close-up.
Hier zie je dezelfde meisjes maar dan afgedrukt met inkt, je krijgt dan een scherpere afdruk. Hierna zijn enkele sneeuwvlokken en hulsttakjes met metallic PP's bewerkt.


Hope I did make it easier for you to create a card like this, if you have any questions...don't hesitate to ask!
Ik hoop dat ik het gemakkelijker heb gemaakt om deze kaart te maken, als je vragen hebt......laat het me weten!
Till next time,
tot de volgende keer,


yellow ochre 270.8/270.5
black 800.5
Versamark/sponge
Memento inks; black/peanut brittle/rich cocoa
Distress stain Tarnished Brass
Memorybox dies;
Holly Holiday frame set
Gwyneth flourish
Precious elements
Angel corner
cling stamp Marianne design
Viva Decor stamps
Chocolate Baroque 'Warm Christmas Wishes'
Crealies creative flower no.2
Crealies creative petal no.6
Crealies Bits & pieces clear stamp no.3
black card 15x15 cm(folded as an easl)
zwarte kaart 15x15 (gevouwen als easl kaart)
white card 14.5x14.5 cm (inside)
black paper (thin)for die cutting flower and leaves
black and white paper for other die cuts
pearls
Step by step instructions
stap voor stap beschrijving:
1. Start working on the white card(14.5x14.5) with one of the small stencil circles in the center, sponge with Versamark, remove stencil and add light Gold Pan Pastel
1. Begin met de witte kaart (14.5x14.5) leg hierop een van de kleine cirkels van het stencil in het midden en spons met Versamark, verwijder stencil en bewerk met Pan Pastel licht goud.
2. Position the large circle stencil over it and sponge the large circle template(as shown in picture above), remove stencil and add PP light gold.
2. Plaats het grote cirkel stencil (zie foto boven) eroverheen en spons de buitenste rand met Versamark, verwijder stencil en bewerk met licht goud PP.
3. Stamp a fragment of the Viva Christmas text in the left bottom corner with Memento Peanut brittle. Colour the white spaces in the corners of the card with PP yellow ochre tint
3. Stempel een gedeelte van de Viva kersttekst in de linker onderhoek met Memento Peanut brittle. Geef de witte gedeelten van de kaart rondom met PP yellow ochre tint wat kleur.
4. Work on all 4 edges of the card with the two Viva Decor Holly swirl stamps starting with the lightest colour and building up layers with darker colours( Peanut brittle/Rich Cocoa/Tuxedo Black)
This piece is now finished .
4. Bewerk alle 4 de randen van de kaart met de twee Viva Decor Holly swirl stempels beginnend met de lichtste kleur en breng lagen aan met donkerdere kleuren.(Peanut Brittle/Rich cocoa/Tuxedo Black)
Dit is nu klaar.
5.Work on all black die-cut elements with Versamark and the craquele fragment (Bits&pieces no.3) and add PP rich gold. It creates an aged effect.
5. Bewerk alle zwart gestanste onderdelen met Versamark en de Crealies craquele stempel en breng dan PP rich gold aan.
6. Colour the little white label with PP yellow ochre and stamp the craquele structure with Versamark and add the PP rich gold. Stamp the sentiment with black.
6. Kleur het kleine witte label met PP yellow ochre en stempel de craquele structuur met Versamark en bewerk met PP rich gold.
7. Stamp the girl with Versamark on the white die-cut and add PP light gold en give more accents with PP rich gold. (if you want to soften the edges of the stamp before stamping wipe some ink off with a baby-wipe, because the stamp is a bit smaller than the die-cut) Work on the edges with a tiny bit PP black to create more depth.
7. Stempel het meisje met Versamark op het witte gestanste kaartje en bewerk met PP light gold en wat accenten met PP rich gold.( als je de randen wilt verzachten van de stempel voordat je afdrukt, veeg dan wat inkt weg met een baby doekje. De stempel is namelijk iets kleiner dan de stans) Bewerk de randen met een klein beetje zwarte Pan Pastel voor meer diepte.
8. Work with Distress stain Tarnished Brass on the edges of the large and small black label and the Christmas baubles. It creates a nice effect.Let it dry.
8. Bewerk de randen van het grote en kleine zwarte label met Distress stain Tarnished Brass. Het geeft een leuk effect.Even laten drogen.
9. Shape the flower en leaf elements with a stylus tool on a foam mat and attach them with a strong gluepen on each other to create a full flower.(a tiny drop in the center of each flower will do)
9. Vorm de bloem en blad elementen met de bol tool op een rubber matje en plak ze op elkaar met een sterke lijmpen.( een klein tipje in het hart van elke bloem is genoeg)
10.Attach the large square card on the inside with less stronger glue or tape.
10. Bevestig de grote vierkante kaart aan de binnenzijde met minder sterke lijm of tape.
11. Attach the large swirl on this card with a bit of tacky glue. Position the flower where you want it and put the leaves under it, remove the flower and glue the leaves. Than replace the flower and attach it too.
11. Bevestig de grote swirl op deze kaart met de tacky lijm. Plaats de bloem waar je 'm wilt hebben(nog niet lijmen!) en schuif de blaadjes eronder waar je ze leuk vindt. Haal de bloem weg en lijm de blaadjes. Lijm dan de bloem er pas op.
12. Attach the large black label on the card with tape. Attach the corner die cut with a bit of tacky glue. Attach the 'girl' on the card and attach the frame with some foam tape to create more depth. Attach the little white label with the sentiment with foamtape on the small black label and on the card. Than attach the hanging baubles.
12. Bevestig de grote zwarte label op de kaart met tape. Plak de hoek met een beetje tacky glue en bevestig het 'meisje' op de kaart. Hierop het frame met wat foam tape om meer diepte te krijgen. Bevestig het witte label met tekst met foamtape of het kleine zwarte label en dan op de kaart. Dan de hangende kerstballen met een tipje lijm op de strik.
13. For the finishing touch you can add some pearls or gemstones( put a little bit glue under it)
13. Voor de finishing touch kun je wat plakparels of steentjes bevestigen( geef hieronder ook een tipje lijm!)
Well, it's a labor intensive card but worth wile the effort I think...........
Zo, het is een arbeids intensieve kaart maar zeker al het werk waard denk ik...........
Now over to the 2nd card.........almost the same, but different colours and some other die-cuts
Nu over naar de tweede kaart........ongeveer hetzelfde, maar andere kleuren en wat andere snij mallen.


This is a variation made in white with blue and silver
Dit is een variatie gemaakt in wit en zilver

Which materials are different from the previous card:
Welke materialen zijn anders dan bij de vorige kaart:
Pan Pastels:
Metallics Silver and Pewter 920.5/921.5
Ultramarine: 520.8/520.3/5201
Memento inks: Gray Flannel/Nautical Blue
Distress stain Brushed pewter
Memory box dies:
Katy corner
Peaceful Snowflake frame set
Precious snowflakes
Broken white cardstock
thin matching matte and shiny paper for flower and leaves die cuts
Gebroken wit cardstock
dun bijpassend mat en glanzend papier om de bloemen/blaadjes te snijden
Girl stamp Marianne design
The step by step instructions of this card are exactly the same as written above.
De stap voor stap beschrijving is precies hetzelfde als hierboven beschreven.
Here you see the same girl stamps but here is the image only stamped with inks, so the image is sharper. Than I've added on some of the snowflakes and holly branches the metallic PP's. You can see that on the close-up.
Hier zie je dezelfde meisjes maar dan afgedrukt met inkt, je krijgt dan een scherpere afdruk. Hierna zijn enkele sneeuwvlokken en hulsttakjes met metallic PP's bewerkt.


Hope I did make it easier for you to create a card like this, if you have any questions...don't hesitate to ask!
Ik hoop dat ik het gemakkelijker heb gemaakt om deze kaart te maken, als je vragen hebt......laat het me weten!
Till next time,
tot de volgende keer,